
Interview Transcript Layout: A Practical Formatting Guide
Learn interview transcript layout best practices for clean, readable transcripts. Covers speaker labels, timestamps, verbatim vs. cleaned, and publishing tips.
A transcript can look finished and still be almost useless. The audio is in the folder, the auto-caption file is there too, and somebody still has to turn the mess into something a journalist can quote, a researcher can code, or a producer can export without breaking the timing. That's where interview transcript layout starts doing real work, because the same interview can be shaped into very different deliverables depending on who needs it next.
The first mistake is treating layout like decoration. It's not. A solid header block, clean speaker labels, timestamps, bracketed cues, and sane paragraph breaks make the transcript readable in Word, portable into PDF, and easier to move into downstream text-export formats, which is why institutional guides keep converging on the same basics, like 1-inch margins, 12-point type, left justification, and visible page markers in archival workflows. If you want a reference point for structured report presentation before you build your own template, it also helps to browse professional report formats so you can see how documentary structure changes the way a file gets read.
For teams that are starting from audio instead of a polished file, a fast capture workflow can help before the cleanup begins. A practical starting point is the audio transcription workflow, then layer the transcript structure on top of the draft instead of trying to invent format and content at the same time.
Why Interview Transcript Layout Matters Before You Hit Record
A 90-minute interview lands in a shared folder as one audio file and a rough auto-caption dump. By morning, a junior editor is expected to pull usable quotes, preserve names, and make the file consistent enough that nobody has to decode it twice. That's the point where layout stops being cosmetic and becomes an editing system.
The fastest way to lose time is to transcribe first and format later. Reworking a long transcript after the fact means touching every speaker turn, every timestamp, and every note about pauses or overlap. A locked template saves that cleanup. It also keeps one interview usable across very different outputs, because a newsroom quote file, a qualitative coding transcript, an archive copy, and a subtitle draft do not need the same density of detail.
A decision about layout starts with the downstream use.
A coding transcript needs consistent speaker turns and structure that analysts can scan. An archive transcript needs provenance and conservative verbatim handling. A published feature needs readability. A subtitle or caption workflow needs timing discipline more than literary polish. Build the layout around the job, and you reduce revision. You also avoid copying one house style into every project.
For teams that begin with audio instead of a polished file, a fast capture workflow can help before cleanup starts. A practical starting point is audio transcription workflow, then layer the transcript structure on top of the draft instead of trying to invent format and content at the same time. If you need a reference for how a file reads on the page, it also helps to browse professional report formats before you settle on your own template.
The header block deserves early attention too, because it sets the file up for later use. I treat it as part of the transcript, not as a cover note. A clean transcript usually begins with title and metadata, then moves into the dialogue.
A solid institutional guide from the American Folklife Center gives a useful baseline for oral-history files. It calls for 1-inch margins, 12-point Times New Roman, left justification, no speaker indentations, and curly quotes left out of the final file. Page numbers go at the bottom center, with none on the cover or preface pages.
Those rules are not there for style alone. They keep the transcript readable in Word, stable in PDF, and easier to move into archive systems or text-export formats without breaking alignment. For an editor, that is the test.
Core Building Blocks of a Clean Interview Transcript
A clean transcript usually begins with a header block that captures the basics before the dialogue starts. I'd treat that block as essential metadata, because archives and editorial teams both rely on it to keep the file readable later.
A practical header can include:
- Interview title
- Date
- Location or medium
- Interviewer name
- Interviewee name and role
- Recording duration
The rest of the file works better when every speaker turn is easy to scan. A strong institutional guide from the American Folklife Center says oral-history transcripts should begin with title and metadata, use 1-inch margins, 12-point Times New Roman, left justification, no speaker indentations, avoid curly quotes, and place page numbers at the bottom center with no page number on the cover or preface pages. The same kind of documentary structure shows up in archival guides that ask for names, dates, locations, and versioning before the dialogue begins, because those details support indexing and later citation. For a full editorial workflow, the top interview transcription platforms often surface these same structural choices in their export and editing tools.
Speaker labels and timestamp placement
Speaker labels need to stay consistent. Three common forms hold up well in practice:
- ALL CAPS first names when you want very quick scanability
- Role labels like INTERVIEWER and SUBJECT when anonymity matters
- Full-name first reference, then last name afterward when archival precision matters
A separate archive guide adds that first mentions should use full names, then switch to last names later. Another transcription guide requires timestamps to appear at least once per page and in real time, with two spaces after the timestamp before text starts. I prefer a timestamp line above a turn for files that need searchability, but inline timestamps work when you want a tighter reading flow in Word or Google Docs.
Practical rule: if you expect later editing, put timestamps where they're easiest to scan and least likely to be deleted by accident.
Non-verbal cues and paragraph breaks
Bracketed cues should stay purposeful. Common examples include [laughs], [pause], [unclear], and [00:42:15 crosstalk]. They matter when a pause changes meaning or an overlap affects attribution, but they shouldn't flood the page just because the audio contains them.
Paragraph breaks should start at the new speaker label, not with indented continuations. That keeps the file readable after copy-paste into CMS fields, subtitle tools, or text-only review systems. A simple working file might look like this:
Project Interview, 12 March 2026, Zoom
Interviewer: Mia Chen
Guest: Jordan Lee, Product Manager
00:01:12
MIA: Thanks for joining. Could you walk me through the launch?
00:01:16
JORDAN: Sure. We had a tight timeline, and the team was still figuring out the final scope. [pause]
00:01:24
MIA: What changed first?
That format is simple, but it gives editors the anchors they need.
Verbatim Versus Cleaned-Up Transcripts
The most useful way to think about transcript style is as a continuum, not a binary. At one end is strict verbatim, which keeps false starts, filler words, and stutters. In the middle is intelligent verbatim, which removes some clutter but preserves the speaker's meaning and rhythm. At the far end is a cleaned readability transcript, which keeps the ideas but strips away what slows the page.
| Original Spoken Exchange | Verbatim Version | Cleaned-Up Version |
|---|---|---|
| “So, um, I, I think we kind of, like, missed the deadline because the vendor, uh, changed the file format.” | So, um, I, I think we kind of, like, missed the deadline because the vendor, uh, changed the file format. | I think we missed the deadline because the vendor changed the file format. |
| “No, I mean, the team did try, but we didn't have the final numbers yet.” | No, I mean, the team did try, but we didn't have the final numbers yet. | The team did try, but we didn't have the final numbers yet. |
When strict verbatim earns its keep
Verbatim transcripts are the safest choice when the wording itself is the record. They protect against quote-fabrication claims, preserve hesitation patterns that matter in linguistic or psychological analysis, and hold up better in legal review than a polished rewrite. They also tend to bloat word count and read badly on the page, so they're rarely the best option for a public-facing article.
Cleaned transcripts do the opposite. They're easier to quote in a published story, easier to skim in an executive summary, and usually easier for accessibility workflows because the syntax is less jagged. The trade-off is judgment, because an editor has to decide which fillers are noise and which false starts show uncertainty, emphasis, or tone.
The ethical line
Qualitative research, oral history, and depositions often justify a more literal transcript. Journalism and content marketing often need readability first. If you plan to publish a direct quote, don't clean it and present it as verbatim. That's where editors get into trouble, because the audience assumes the words came out exactly that way.
The cleanest rule is simple. Use the version that matches the risk of the deliverable. If the file may be audited, kept in an archive, or used to defend a decision, keep more of the spoken texture. If the file is meant to be read quickly by a client, manager, or reader, trim it carefully and document the choice in your house style. For teams that want a dedicated cleanup pass, the clean verbatim workflow is where that editorial judgment becomes a repeatable process.
Choosing a Style Guide and Locking Your Conventions
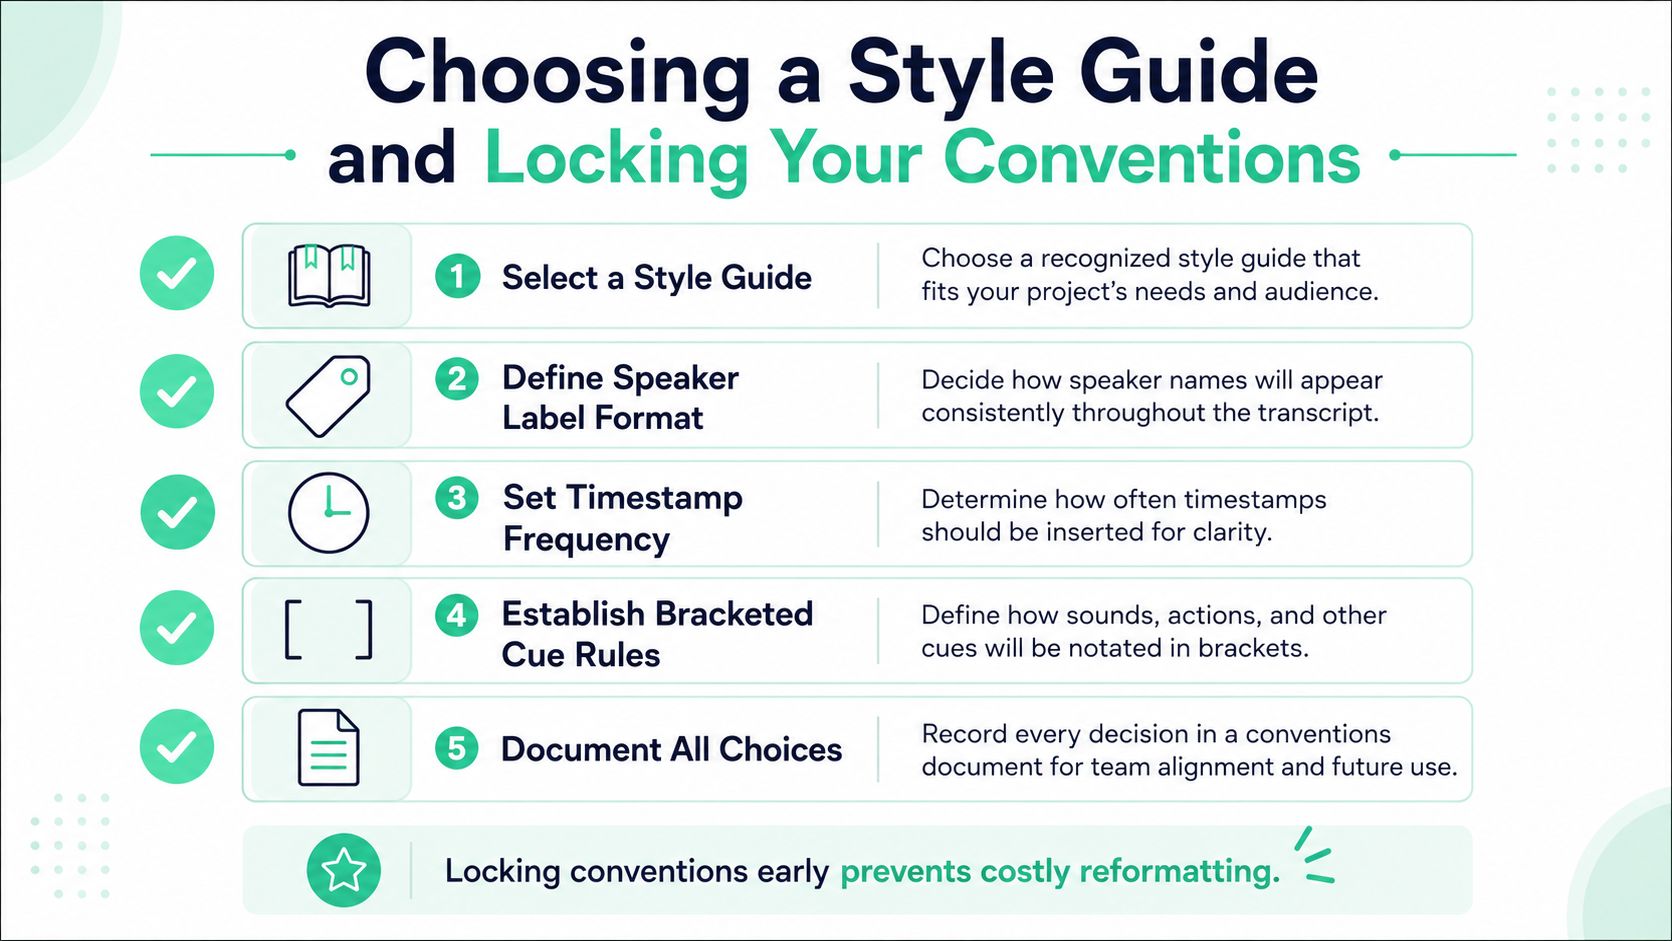
A transcript project gets easier the moment you stop improvising. Whether you borrow from AP, Chicago, APA, or a custom house style, the guide itself matters less than the consistency that follows, because nobody wants to reformat twenty interviews after the first editor notices the speaker labels don't match.
The decisions that need to be fixed first
Before transcription starts, settle these points and write them into a one-page convention sheet:
- Speaker-label format with one rule for every file
- Timestamp precision with one spacing pattern
- Paralinguistic cues with one bracket style
- Filler handling with one standard for repetition and false starts
- Ellipsis and [inaudible] rules with one exact usage pattern
That sheet should travel with the project. A transcriber, editor, and reviewer should all be able to open the same document and see the same logic in place.
A clean convention sheet also reduces friction when multiple files move through the same pipeline. The same interview may pass from a draft transcript to a quote sheet, then into a CMS, then into a subtitle export. If the label format changes halfway through, the later files start inheriting small errors that are annoying to fix and easy to miss.
What consistency buys you
The archival guides are useful here because they show how much work goes into simple consistency. One university guide asks for interviewer and interviewee names, date, location, and duration on the first page, with page numbers on every page. Another archive guide asks for collection number, narrator names, interviewer names, and date in the header, then keeps a consistent header on later pages. Those choices are about auditability as much as appearance, and the same logic holds in modern editorial teams.
The strongest teams don't debate layout on every file. They define it once, then enforce it. That's what keeps the transcript readable when it moves from raw capture to review, and it's what keeps your editors from wasting time on avoidable cleanup. The embedded video below is useful if you want a different lens on setup discipline and software workflow.
{% youtube id="rhEgDJT_2w0" /%}
Adapting Layout for Research, Archive, News, and Subtitle Use
The same interview can end up in four different places, and each one asks for a different layout. A coding transcript needs structure that analysts can tag without friction. An archive transcript needs provenance that still makes sense years later. A published interview needs readable prose. A subtitle file needs timing that matches what viewers can keep up with on screen. One template rarely serves all four well.
| Deliverable | Speaker Label | Timestamps | Verbatim Level | Special Features |
|---|---|---|---|---|
| Qualitative research | Role-based or full names | Frequent, consistent | High, with non-speech cues | Line numbering, overlap markers, coding-friendly paragraphs |
| Oral-history archive | Full names, then last names | Visible on every page | Conservative verbatim | Metadata header, versioning, provenance details |
| Published article | Full names or roles | Selective | Cleaned for readability | Pull quotes, tighter paragraphing, attribution-ready lines |
| Subtitle file | Role labels or short names | Cue-in and cue-out exact | Condensed for reading speed | Character-per-line control, display timing, subtitle export |
Research and archive files do different work
A qualitative researcher needs a file that can be scanned, coded, and compared across interviews. That usually means consistent paragraphing, overlap markers, and enough context to preserve meaning without filling the page with noise. Archive teams want a more conservative record because the transcript may be cited later and has to preserve names, dates, and the original speaking pattern.
Newsroom and publishing workflows ask for something else. Editors need a transcript that reads cleanly, with speaker turns that are easy to attribute and paragraphs that do not fight the page. That often means trimming filler and tightening structure while keeping the interview accurate enough to quote. Subtitles add a different constraint. The file has to fit the screen, respect reading speed, and keep each cue aligned with the spoken line.
Workflow-specific layout beats one-size-fits-all formatting
Teams lose time when they force one layout across every use case. Coders need one version, archive staff another, and video editors often want a subtitle export that follows a different rhythm from the published transcript. A single source file still helps, but the output should change with the downstream job.
When the same interview needs both a research-coded version and an SRT subtitle file, a workspace like transcript.im helps because it keeps the transcript timestamped and lets you export TXT and SRT from the same source without rebuilding the file by hand. If you need to convert video to text first, that same flow keeps the transcript ready for later turns into TXT, SRT, or VTT, depending on whether the next step is coding, publication, or captioning.
Cleaning, Timestamping, and Exporting Without Breaking Alignment
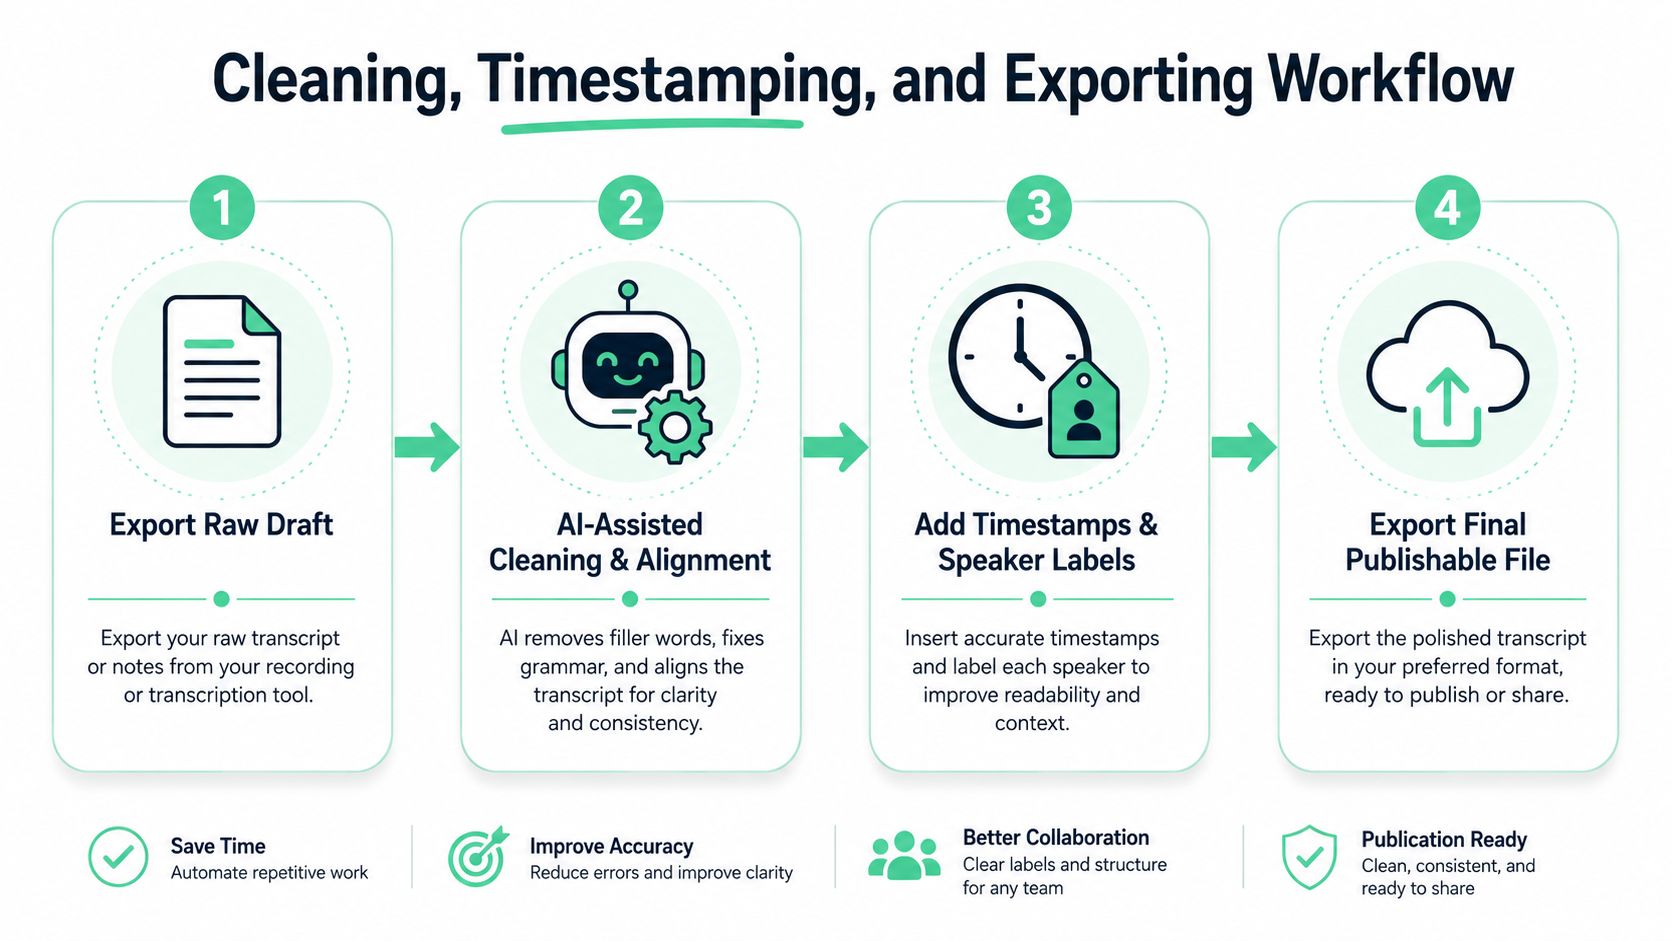
Raw drafts usually fail in the same place, the timestamp no longer points cleanly to the spoken line. Once that alignment drifts, captioning breaks, clip retrieval gets messy, and editors lose confidence in the file. The safest workflow is to preserve the original timecode column while cleaning the text around it.
A reliable editing pass
Start by exporting the auto-transcript with embedded timecodes. Then do one cleanup pass that removes filler only where readability really needs it, while keeping the original timing structure intact. If you're working in an AI-assisted tool, treat the draft as the source record and the cleaned copy as the presentation layer.
Alignment matters more than elegance. A transcript that reads beautifully but points to the wrong audio is a bad transcript.
That alignment rule matters across export types. Word files are easy to review, but they can flatten structure if people delete columns or reflow text carelessly. SRT and VTT preserve subtitle timing, CSV helps coding software and spreadsheet review, and JSON is the usual shape when teams want to push transcript data through APIs. The format you choose should match the next step, not just the current one.
Check the file before it leaves your hands
One final spot-check against the audio is worth the time. Listen to a few awkward joins, confirm speaker labels still line up, and make sure no cleanup pass shifted the line where a quote begins. If you use a workflow that includes translation, cleaning, or batch export, keep the timestamped source untouched so the later versions can still trace back to the original speech.
For teams that want to move from audio to a usable draft before the edit pass, the audio-to-text transcription workflow is a practical starting point. It's much easier to preserve alignment when the first draft already carries the timing structure you need.
Quick-Start Checklist for Your Next Interview Transcript
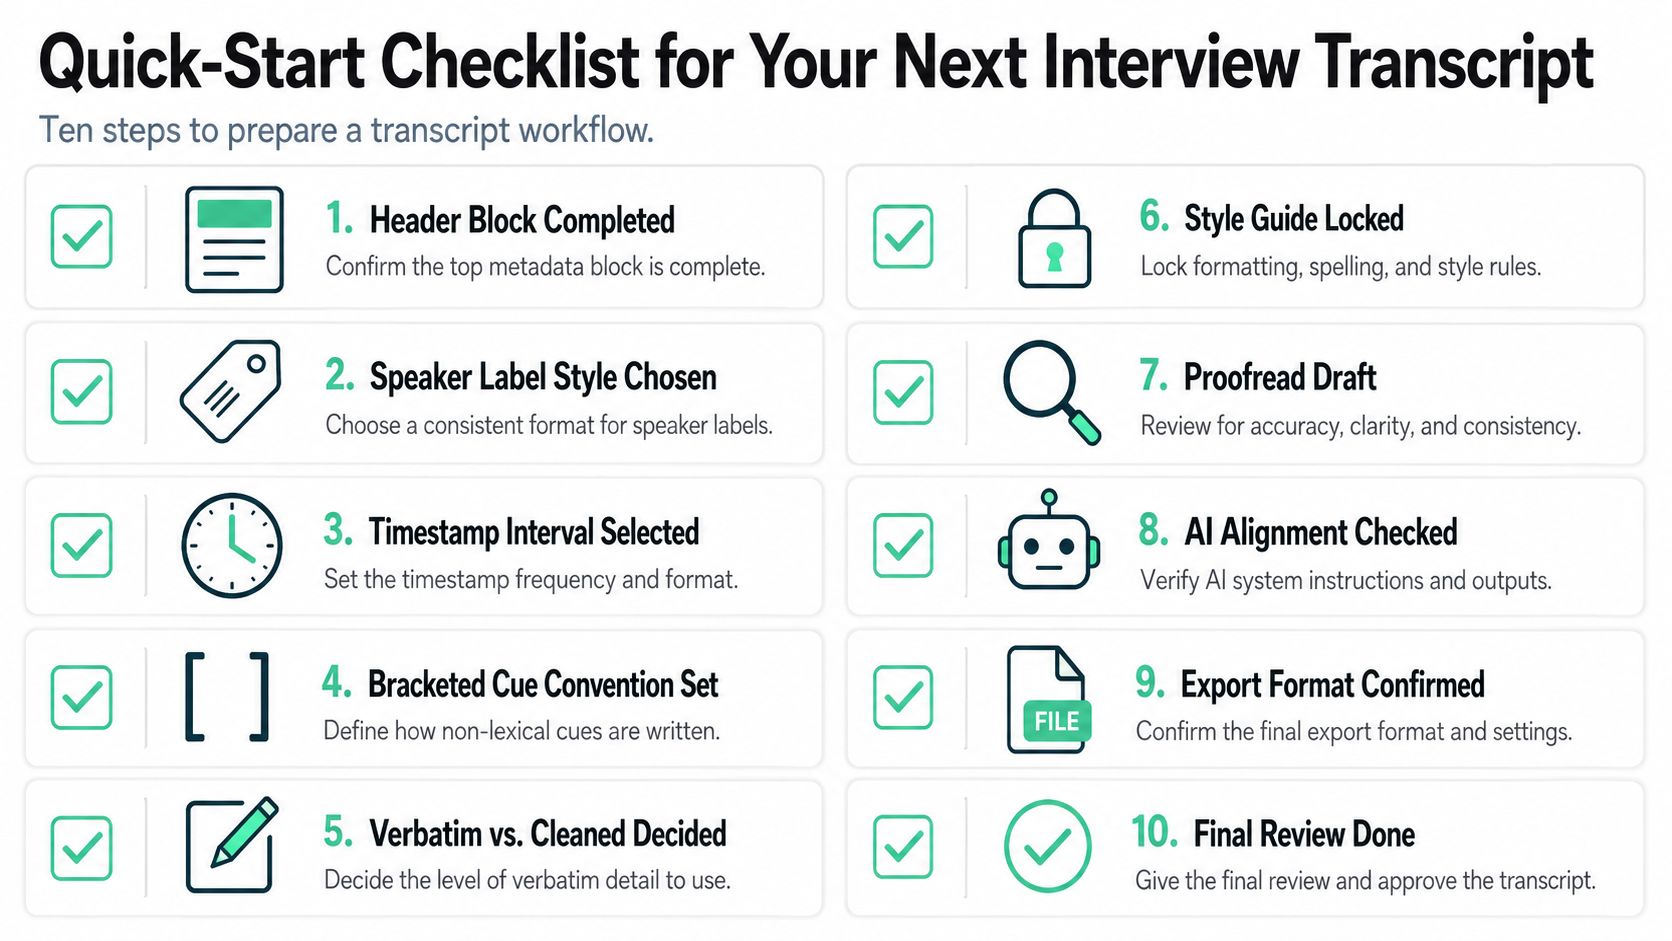
Use this as a one-page setup sheet beside your transcription tool.
- Complete the header block with title, date, location or medium, interviewer, interviewee, and duration.
- Choose one speaker-label style and keep it unchanged across the project.
- Set the timestamp interval and decide whether it sits on its own line or inline.
- Define bracketed cue rules for pauses, laughter, overlap, and unclear audio.
- Decide verbatim vs. cleaned-up before the first draft gets revised.
- Lock the style guide you're following, even if it's a custom house style.
- Proofread names and jargon against the audio and any source notes.
- Check AI alignment so timecodes still point to the right speech.
- Confirm the export format for Word, TXT, SRT, VTT, CSV, or JSON.
- Do a final review on one short section before you release the full file.
A 45-minute interview usually moves cleanly when the order is stable. Import the audio, generate the first draft, apply the transcript style, clean speaker turns, verify timestamps against the recording, then export the final file in the format the next team needs. The layout choices that matter most are the ones you commit to before the revision starts, not after the file has already spread across folders.
If you want a workspace that keeps transcripts readable, timestamped, and easier to reuse across publishing, research, and subtitle workflows, visit transcript.im and try it on your next interview. It helps you turn audio and video into structured text without starting from a blank page, so you can spend less time repairing layout and more time using the transcript.
Transcript Generator
Turn Any Video Into Text
Paste a YouTube, TikTok, or Instagram link and read the transcript, with timestamps on every line.
Exports as TXT, SRT, or VTT.